upd: archiving my blog in 2021 and reading this post again, I am no longer a fan of Sony phones and of Android.
Appears that buying a Sony Xperia phone several years ago was a good call - they appeared to support OpenSource Android very well even for devices that are no longer officially supported, and they even provide instructions on how how to unlock those devices, and build your own ROMs based on AOSP - Android Open Source Project. And they also published instructions on how to build Android 10 (Q) which was released just a few weeks ago!
But despite lots of documentation available on Internet, its still very hard to start compiling Android-based ROMs even if you have access to all the source code and have a good vendor like Sony. With this post, I want to share what I learned so far.
In no way I can pretend to be an expert in this field. If you are looking for one, I can recommend these guys:
By the way, everything I am writing about here is all described at https://source.android.com and https://github.com/omnirom/android, and I am just putting pieces from different pages together here.
Setting up your build environment
Android is based on Linux, so usually its built using Linux machines. There is no support to build ROMs at Windows, and some support at MacOS. Here, I will only be talking about Linux since never owned a Mac.
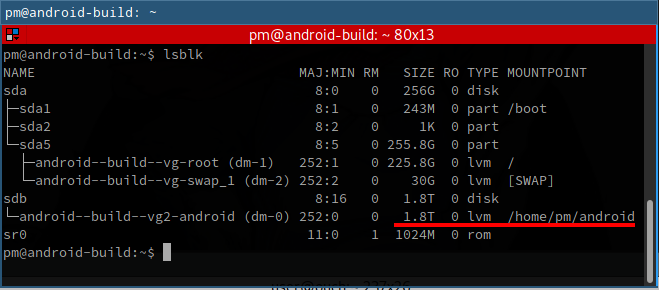
Also, please note that you need to have at least 200+Gb of disk space to successfully build Android. I personally have 2TB since I build 3 different ROMS: Omni, AOSP 9 and AOSP 10
Usually, it does not matter which distribution of Linux you use, but most build systems out there use Ubuntu 14.04 (Trusty) as a standard. I tried many combinations, and it looks like most of those recommendations are outdated. E.g. Android 9 (Pie) requires Java 8 to be built, and Ubuntu 14.04 LTS does not have it, so there’s a hack to get that working. For example, Android Project itself provides a Dockerfile that creates an image based on Ubuntu 14.04 for building Android ROMs. It worked for me for some time, but I ended up just using a virtual machine with the latest Ubuntu LTS.
Instructions below should work with most recent Ubuntu installations.
First, you need to install the required libraries and build tools:
sudo dpkg --add-architecture i386

sudo apt-get update && sudo apt-get install -y git-core gnupg flex bison gperf build-essential zip curl zlib1g-dev gcc-multilib g++-multilib libc6-dev-i386 lib32ncurses5-dev x11proto-core-dev libx11-dev lib32z-dev ccache libgl1-mesa-dev libxml2-utils xsltproc unzip python openjdk-8-jdk libssl-dev lzip repo
Note that I’ve added an extra library libssl-dev which is not required for
AOSP builds, but is needed for OmniROM. And lzip which is needed if you want
to
add OpenGApps to your custom ROM.
I am also using the latest version of the repo tool that is available in
Ubuntu repositories. It may be a bit out of date, but so far I did not have any
issues with it. I just don’t like to add binaries to the OS manually anymore.
If you want to use the latest version of repo as everyone else recommends,
just run a couple more commands:
sudo wget -P /usr/local/bin https://storage.googleapis.com/git-repo-downloads/repo

sudo chmod a+x /usr/local/bin/repo
The last step is to configure your Git user:
git config --global user.name "First Last"
git config --global user.email your@email
And that’s it! Now we are ready to checkout Android and start compiling!
Checking out Android code
Initializing repository
Getting code in Android consists of two stages: first, you init the repository, and then you synchronize (download) the code. And of course you start with creating a directory for it:
mkdir android
cd android
AOSP
Again, I am only repeating the existing documentation here, it’s all very well explained at AOSP website: https://source.android.com/setup/build/downloading#getting-the-files
repo init -u https://android.googlesource.com/platform/manifest -b <your branch>
In most cases you don’t checkout the latest master branch and instead pick a
tag (or branch) corresponding to an Android version release - you can find the
list of branches here:
https://android.googlesource.com/platform/manifest/+refs
Here’s why: most vendors align their code, binaries, and corresponding
instructions with specific Android releases. For example, in
instructions for my Sony phone
I can only use android-10.0.0_r1 while android-10.0.0_r3 is already
available. Furthermore, at the moment of writing this,
OpenGApps which I am using, is not yet available for
Android 10, so I have to use Android 9 instead, and while the latest Android
release was android-9.0.0_r48, I can only use r46 since that’s the latest
Android 9 release my vendor provided their source code for.
Of course, probably we can try using different release versions of vendor code and AOSP, but should there be any bugs, I currently don’t have enough skills to fix them.
OmniROM
Omni is an amazing ROM based on AOSP. It has many useful features and fixes while is not bloated with vendor software. I use Omni as stable ROM for my phone between my experiments with AOSP, and the more I learn about building my own version of AOSP, the more I see how great Omni is, and how knowledgeable are people that build it.
To get Omni, the repo init command has to use a different URL:
repo init -u git://github.com/omnirom/android.git -b <branch>
With Omni, using branches is much easier - you just pick Android version. They already took care about everything else. You still get the list of branches from the Omni Github project itself, and it’s definitely worth visiting it since there they also provide very simple instructions on how to build there (I am going to duplicate those instructions below with minor changes):
https://github.com/omnirom/android
Customizing your ROM
Usually you make the necessary customizations right after you initialized your
repo - this is where you add references to any components that you are adding to
your ROM. For example, if you want to
add OpenGApps, you just add an xml
file (with any name, for example, `opengapps.xml`) to the
.repo/local_manifests/ directory. Below is my version of it. Note this just
copied from the OpenGapps AOSP instructions by the link above:
<?xml version="1.0" encoding="UTF-8"?>
<manifest>
<remote name="opengapps" fetch="https://github.com/opengapps/"  />
<remote name="gitlab" fetch="https://gitlab.opengapps.org/opengapps/"  />

<project path="vendor/opengapps/build" name="aosp_build" revision="master" remote="opengapps" />

<project path="vendor/opengapps/sources/all" name="all" clone-depth="1" revision="master" remote="gitlab" />

<!-- arm64 depends on arm -->
<project path="vendor/opengapps/sources/arm" name="arm" clone-depth="1" revision="master" remote="gitlab" />
<project path="vendor/opengapps/sources/arm64" name="arm64" clone-depth="1" revision="master" remote="gitlab" />

<project path="vendor/opengapps/sources/x86" name="x86" clone-depth="1" revision="master" remote="gitlab" />
<project path="vendor/opengapps/sources/x86_64" name="x86_64" clone-depth="1" revision="master" remote="gitlab" />

</manifest>
This way, you can also add and customize APKs and any open source software in your build. Unfortunately, this is where I am still learning, so not much information in this section yet - I will be updating it as soon as I have more progress, and meanwhile you can find more information at the Android website, and via the links I provide in the end of this post.
Note that if you’ve read the OpenGApps AOSP instructions, they also require you
to change your device.xml settings, and you don’t have the file after you just
initialized the repository. Usually this is done by forking the repository that
contains your device.xml and making the necessary changes in your fork. And
then you just ensure that your AOSP-based ROM’s manifests point to your fork
instead of the original one. You can see lots of examples of this in the OmniROM
repository (and that also explains why everytime you look at someone’s custom
Android ROM repos, you see dozens of forks of Android-related repositories)
Unfortunately, I am still in process of learning how to do this properly, so I can’t really point to any forks that I’ve made so far - instead, I just sync the repo and do all my customizations just before starting the build. But that’s a wrong way to do that - all my changes are lost every time I update my local repo. In the end of this post, I am sharing some links that can help you understand this process better.
Downloading code
After repository was initialized, its time to download (or synchronize - the
same command is used to update) code. This is a very long (hours, sometimes even
days) process, and below is an optimized command you can use that will help
making it faster. By the way, if you are using a VM or server like I do, it’s
good time to use something like [screen](https://linux.die.net/man/1/screen)
so that you can disconnect from this session while its running:
repo sync --force-sync --no-clone-bundle --no-tags -j$(nproc --all)
Creating a local mirror
If you are downloading AOSP, you will notice how slow it is. AOSP Downloading page provides instructions on how to create a local mirror. Instructions below are taken from there:
# Create a directory for your mirror
mkdir -p /path/to/my/mirror
cd /path/to/my/mirror

# Mirror AOSP repository
repo init -u https://android.googlesource.com/mirror/manifest --mirror
repo sync
After that, you can init a repo by referring to your local mirror instead of
slow android.googlesource.com:
repo init -u /path/to/my/mirror/platform/manifest -b <your branch>
This saves a lot of time in my case, when I have two parallel Android repos, and only spend time syncing mirror once. But note that it takes a lot of space. I had to reserve 2 Tb only for my Android directories:
Building the code
After you synchronized (and customized) the code, you can now start building it. It’s done in two simple steps:
Step 1: Initialize environment
First, you run the envsetup script that initializes your local environment,
set paths to proper tools and defines required variables. This also means that
you need to run it every time you re-login. And this step is always the same for
all types of Androd-based ROMs:
source build/envsetup.sh
After that, you need to set a target for your build - and that’s a matter of
preference how to do that. E.g. Sony’s AOSP build recommends you running the
lunch command that will automatically fetch all information about available
device configurations and offer you to choose one. OmniROM, on contrary, will
offer you to run the brunch command that will fetch device configuration based
on your input and start the build.
This is unfortunately another item that I am still learning, so I will just put both instructions:
# AOSP
lunch

# OmniROM
brunch <device name>
Step 2: Start the build
After that, you can just run the make command, and the build will be started.
Note that it may take a couple of hours, and in the example command below I am
adding an argument to use all available CPU cores on the system:
make -j $(nproc --all)
It’s normal to have warnings during the build, and in most cases they can be safely ignored. I so far only once heard about an Android build that has no warnings, but I never saw it with my own eyes. My plan however is to help get rid of these warnings as soon as I gain the required knowledge.
Flashing the new ROM
After the build is completed, your binaries will be available in the
out/target/product/<your phone> directory.
If you were building AOSP, you’ll get images corresponding to partitions in your Android phone, e.g:
boot.img cache.img recovery.img system.img userdata.img
And its normal if there’s more img files than your phone has partitions (e.g.
in my case, there are always some ramdisk partitions). You can just ignore
those.
All you need now is just to flash the image files. Usually, image name will correspond to a partition it goes to, e.g.:
fastboot flash boot boot.img
fastboot flash cache cache.img
fastboot flash recovery recovery.img
fastboot flash system system.img

# note that the following command deletes all data at your phone
fastboot flash userdata userdata.img
Flashing is a large topic by itself, and its beyond this blogpost. For example,
with OmniROM, you’ll get a zip archive instead of a bunch of image files. That
file can be flashed via tools like
TWRP - just follow OmniROM instructions.
I personally prefer to use images, and I usually find img artifacts remained
from OmniROM build and flash them manually.
Useful links
Here’s some very useful links that can help you start building your own Android-based ROMs:
https://bootlin.com/doc/legacy/android/android-slides.pdf
https://forum.xda-developers.com/general/xda-university/